|
|
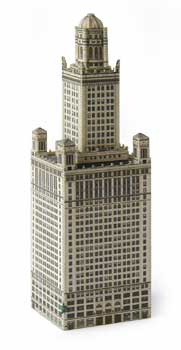 35 East Wacker Drive 35 East Wacker Drive
 |
 |
To start the model, look for the star shaped piece that will become the dome. Score along the dotted lines with a hobby knife, as described on the Tips & Techniques page.
Cut out the dome piece, fold the sections along the score lines and roll the sections over a toothpick or round object to give them an inward curl.
Next, flip the dome over so that the non-printed side is up. Then, cut out the tiny supports for the dome. The two interlocking half circles are glued at right angles. Then glue them to the back of the dome piece. Line up the supports with the inside points of the star-shaped dome as shown in the diagram. Lastly, glue the four quarter circles in the spaces between the arms of the supports. |
|
 |
Fold in the point of the star with the round tip over the supports so that the tip is in the center. Fold the rest of the points down and glue in place so that their tips meet at the center. If you curled the tips of the star inward they should stay in place with just a bit of glue. |
 |
 |
Score along the dotted lines on the four buttresses, but do not cut them out yet. If you cut them out before folding, the pieces will be too small to fold easily. Instead, while the buttresses are all connected to the same paper, fold carefully along the score lines. After all the folds have been made, cut out the small pieces. Glue them to the corners of the cylinder.
Cut out the tiny octagonal chimney top and glue it to the top of the dome. |
 |
 |
Assemble the small collonades for the corners of the building. Insert a tiny wad of tissue paper into the collonade to give the triangular roof sections something to attach to when gluing, as described on the Tips & Techniques page. |
|
 |
Glue the top of the tower in place and add the four collonades in their places marked by letters 'B' to 'E'. |
|
 |
If you think you can manage the tiniest piece, cut out the little clock. Fold the piece like a W, so that the clock faces are opposite each other, while the ends of the pieces attach to the corner at the second floor. |
And now you are finished with your Jewelers Building model!
|