Build Your Own Chicag
About the Cards
Photo Gallery
How To Build It
Tips & Techniques
Read More About It
Free Models
Order Cards
Water Tower model Chicago Water Tower
Cut out the cupola of the tower. Curl the roof of the cupola (the triangular sections) inward by bending the sections over a round dowel or side of a pencil.

Then fold the eight walls around and glue the tab inside to make an octagonal cylinder. Push the roof sections towards each other and glue the edges against each other. Add a small wad of tissue paper inside the cupola to glue the roof sections, as described in Tips & Techniques.


Cut out the long shaft of the tower and the uppermost battlement. Fold each along the dotted lines and glue around to make an eight-sided cylinder.

Slip the battlement over the outside of the top of the shaft so that a little bit of the railing still protrudes above the shaft. Line up the stars (and the seams) of each piece when you glue them together to match the shadows printed on each piece.


Next, glue the little octagonal roof inside the battlement so that it rests on top of the upper edges of the shaft.

Place the cupola on top of the octagonal roof, lining up the star and seam with the star on the roof.


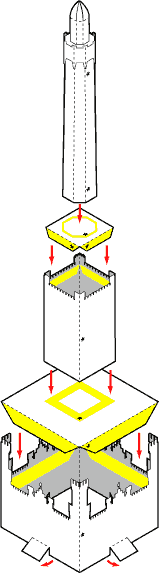
The next sections of the Water Tower are straightforward boxes.

On the lowest section, fold the staircases outward as shown.

Glue the rooftop pieces of each section inset a little from the top edge of the wall so that a little railing is created around the rooftops of each level. You can use a chopstick or blunt pencil to push the roof pieces up from the inside to move them into the right position and level all around.

Glue the top shaft onto the middle section and the middle section onto the lower section, taking care to line up the stars as before.
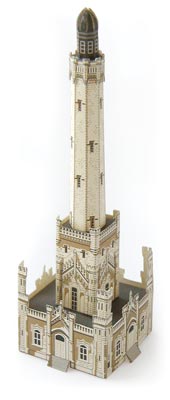
Now your model is complete! If you lined up all the stars while gluing the pieces together, the shadows printed on the model should line up, as if the sun were shining on the real Water Tower from the southeast.

Read more about the Water Tower