|
|
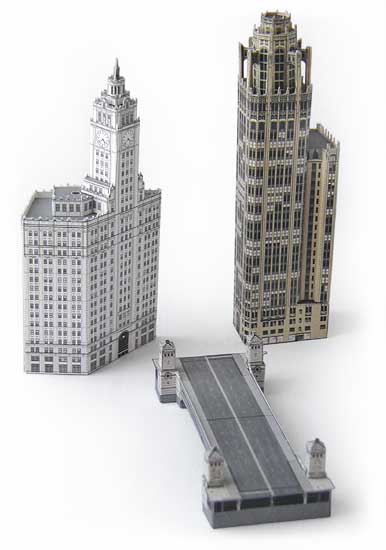
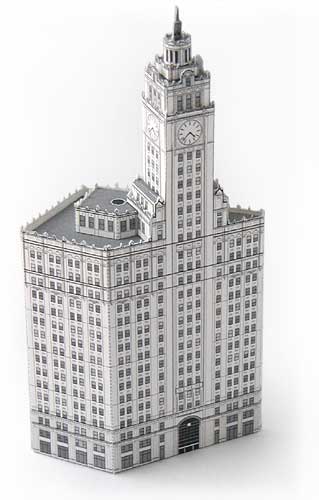 Wrigley Building Wrigley Building
 |

|
Begin your Wrigley Building model by cutting out the trapezoidal rooftop piece and the three walls of the clock tower.
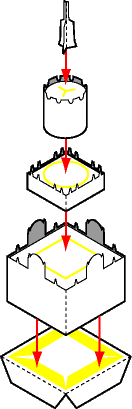
Glue the tower to the rooftop using the tabs marked 'A'. If you are careful to make sure the tower is glued directly in its position and is square and vertical from the roof, your model will proceed with much better results. |
|
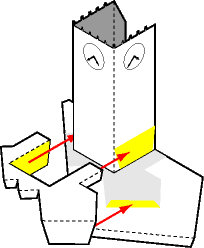 |
Cut out the smaller, oddly-shaped penthouse roof section. A sharp knife will help to score crisp folds for the many tabs along the edge. If you accidentally cut the rooftop in half at its narrow point, do not fret, your mistake will be hidden by the tiny rooftop houses in the next steps!
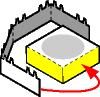
The penthouse roof fits snugly around the bottom of the tower and is secured with tabs 'B' and 'C'. You will want to test this piece for a tight fit before gluing it permanently. The tabs 'B' and 'C' should fit around the tower without bending or straining the penthouse roof, and the tips of the tabs should rest against the larger trapezoidal roof piece at the base of the tower. After you have fit the penthouse roof around the tower, the tab marked 'D' should be glued in position on the trapezoidal roof.
|
 |
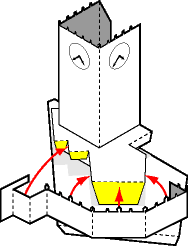 |
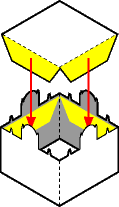
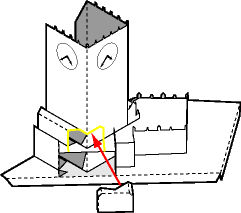
Look for the piece with small arcade of windows that forms the penthouse walls. Before cutting around all the tiny urns and carvings on top of the wall, score or fold along the mountain folds and two valley folds on the left of the piece. Note that the small valley fold on the left of the piece should not be creased completely across the wall: there is a small extension on top which will not be folded, as seen in the illustration below. Glue the penthouse walls all around the penthouse roof tabs, tucking the rightmost end of the wall piece under the penthouse roof and letting the small railing extension on the left touch the side of the tower. Be careful to keep the bottom of the walls flush with the trapezoidal roof. |
|
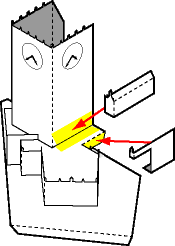 |
Next cut out the small wall with tab marked 'E' and little house with tabs 'F' and 'G'. Fold the small railing on the left and glue the wall in the position marked 'E' against the penthouse roof tab. Fold the sides and roof of the little house and then glue it into position against the tower and penthouse roof in the positions indicated by 'F' and 'G'. |
 |
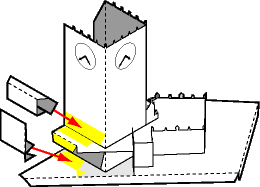 |
In a similar sequence, cut out the wall marked 'H' and the little house marked 'I' and 'J'. The wall features a valley fold and should fit into position against the penthouse roof edge where marked 'H'. The little house features a diagonally cut roof and should fit into position against the tower in position 'I' and 'J'. |
|
|
Next cut out the last little house with an unusual triangle shaped roof. When folded into a box-like shape with mansard eaves, the little house should fit into position against the corner of the tower and the diagonal end of the little house marked 'I' and 'J' from the last step, as seen below. |
|
|
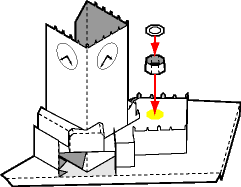
If you haven't had enough of the tiny pieces yet, cut out the octagonal chimney top and fold the eight-sided chimney strip into a little cylinder. Glue these into position on the penthouse roof. |
 |
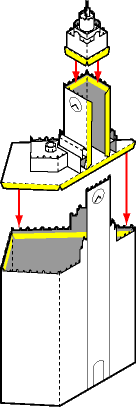 |
Now you may glue the top tiers of the tower inside the top of the tower shaft. Then, cut out the walls of the building, fold and glue.
After the glue has dried, glue the roof inside the top edge of the walls. Make sure you push the roof down slightly below the top of the wall so that the windows and clocks on the tower match up correctly. |
And now at last your model of the Wrigley Building is finished. Place it next to the Chicago Tribune Tower and Michigan Avenue Bridge, as these are all built in the same scale.
|