|
|
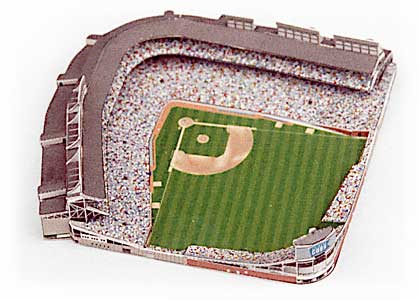 Wrigley Field Wrigley Field
 |
Cut out the large grandstand piece. Make sure to cut out the tiny slots on each end and score the flaps that will fold down. Bend the ends of the grandstand upwards in a slight valley fold at the diagonal dotted lines. The "elbows" of the piece should be bend inwards to give the grandstand a slight bowl shape. The tiny brick walls at the front of ends of the grandstand should be fold down to become vertical, with the white flaps used to glue the front of the grandstand to the base. |
|
 |
|
Now comes the hardest part of constructing the model.
Before gluing, fit the grandstand piece inside the exterior wall, sliding the slots around the supports for the upper deck. The flaps on the back of the grandstand piece should butt against the base, indicating the height of the rear of the grandstand. Depending on how straight your outfield walls ended up, you may have to trim them slightly to accomodate the front ends of the bleachers where the tiny brick walls butt against the outside walls of the stadium.
After the grandstand is in its place, glue it down by using a toothpick to push a little glue under and behind the grandstand to glue the flaps that secure it to the base and to the exterior wall supports. This way you can glue the grandstand in place and keep the parts together in the right position.
At last the difficult part is finished! Cut out the bleachers and give them a gentle concave shape. Adjust the bend to fit snugly against the outfield walls and glue.
|
|
fig. 4
|
 |
Now at last, fold all the flaps on the top of the exterior wall inward. If you've given them a crisp score, they should fold easily without crumpling. Cut out the large roof piece. Fold its flaps down slightly and then bend the roof piece gently to fit the shape of the exterior walls. Glue it to the top of the exterior wall, lining up the stairwell vents with corresponding gray squares on the roof piece. |
|
|
|
Score and cut out the upper deck exterior wall. Bend it to fit the shape of the top of the roof and glue it in the lettered position marked. |
|
|
|
Cut out the upper deck of the grandstand. Bend it in a concave shape similar to the lower deck, though at a steeper angle. Test the fit of the piece and then glue to the flaps on the interior of the roof. The flaps on the upper deck piece may be glued against the inside of the upper deck exterior wall. |
|
|
 |
Score and cut out the tiny press box. Bend into a curved shape and glue to the position indicated on the upper deck. |
|
 |
|
Cut out the remaining long curved roof pieces. First, bend the piece with flaps on it into a convex shape. Fit and glue it to the top of the exterior wall. Then, bend the second roof piece into a concave shape and glue it to the flaps on the first piece. |
|
|
 |
Score and cut out the small staircase dormers. Use a toothpick to give each dormer a curved roof. Place the dormers in the same order left to right, (as seen when looking at the exterior wall) as they are printed on the card left to right. Note that each dormer has an inward and outward end to fit the slight tilt of the rooftop. |
|

|
|
|
Cut out the scoreboard. Fold the flaps of the outfield exterior wall inward and glue the scoreboard as shown. |
|
Cut out the lights, folding the side braces back. Each light group has a different number of braces supporting it. Glue the lights to the rooftop in the same order left to right as they are printed left to right on the card. Look for the thin white lines printed on the rooftops to show the correct positions of the lights. In the diagram below you can see where each of the various light groups should be placed. |
|
|
At last your model of Wrigley Field is finished!
|