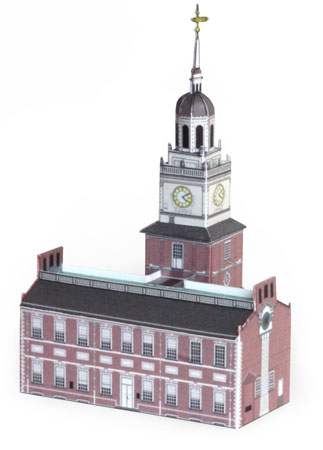
Cut out two large walls of the building and glue them together into a rectangular shape. Fold the two chimmneys down and glue flat.
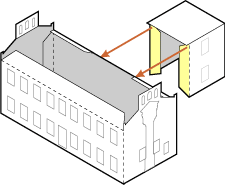
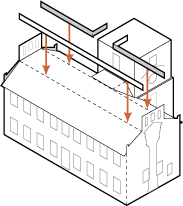
Cut out the tower base wall, fold and glue it into a rectangular shape. Glue the tower base to the center of the rear wall of the building. The square roof of the tower base will slightly overlap the rear wall.
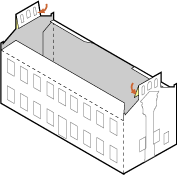
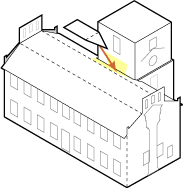
Cut out the main roof and fold. Glue the main roof to the flaps on top of the walls. The roof eaves will hang over the walls slightly, and the flat center section of the roof should fit just underneath the edges of the chimmney flaps.
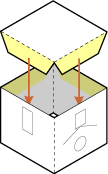
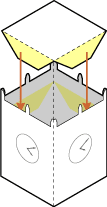
Cut out the second tier of the tower and assesmble into a square. Then fold the largest square roof and insert. The rooftop should be flush with the top of the wall of this section.
Glue the second tier of the tower in place, with the small door and staircase facing the main roof.
Cut out the small triangular roof and fit in place between the main roof and the wall of the second tier. The flat section of the triangular roof should be level.
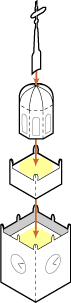
Cut out the third tier of the tower which features the tower clock. Cut and fold the next smallest square rooftop and glue it in place slightly recessed in the clock tower, so that the rooftop is level with the bottom of the balcony above the clock. You can strengthen the small urns on top of the railing with a drop of cyanoacrylate (see Tips).
Cut out the fourth tier of the tower and assemble in a square. Cut and fold the very smallest square rooftop and glue it in place so that the edges of the tabs are flush with the bottom of the walls. Strengthen the tiny urns on the roof edge with a drop of cyanoacrylate (see Tips).
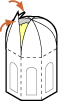
Cut out the dome and glue it into an octagonal cylinder. Insert a small wad of tissue paper soaked in glue to help glue the rooftop in place. Bend the triangular rooftop sections into place and push the tissue paper up inside to make a round and strong dome (see Tips).
Cut out the two tiny weathervane pieces and glue back to back.
Glue the four tower pieces in place atop one another. If you like, strengthen the thin weathervane with a drop of cyanoacrylate (see Tips).
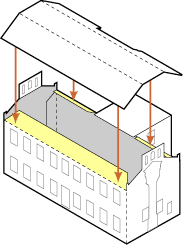
Add the railings in place on the rooftop. Score the shorter railings with valley (reverse) folds. Each shorter railing fits along the fold line of the rooftop, running from the back edge of each chimmney to the wall of the second tier of the tower.
The longer railing fits along the fold line running from the front edge of each chimmney.
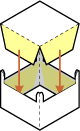
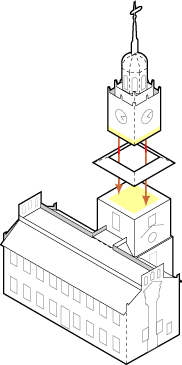
Cut out the four-sided roof and fit it around the bottom of the upper section of the tower completed in fig 3.
Glue the upper section of tower to the top of the second tier of the tower, so that the four-sided roof fits in place against the roof of the second tier.
Now your tiny Independence Hall model is finished!
Cut out the little people, if you like, to place around the building.


 Independence Hall